I am jumping wildly from iso to shading and now to a top down view. I apologize for the lack of order in the tutorial posts at the moment but I just felt like writing this one after creating the art for a request.

 Top down characters – there really is not that much to see when you look straight down on a character. You see the top of the head, the shoulders, a bit of the legs and the arms when they move.
One way to show what the shape really represents is by adding a nice long shadow of the shape – which works well in 3D engines but it a proper pain to reproduce in 2D as the shadow needs to move with the character.
Alternatively you can add more detail to describe the parts better and make them recognizable.
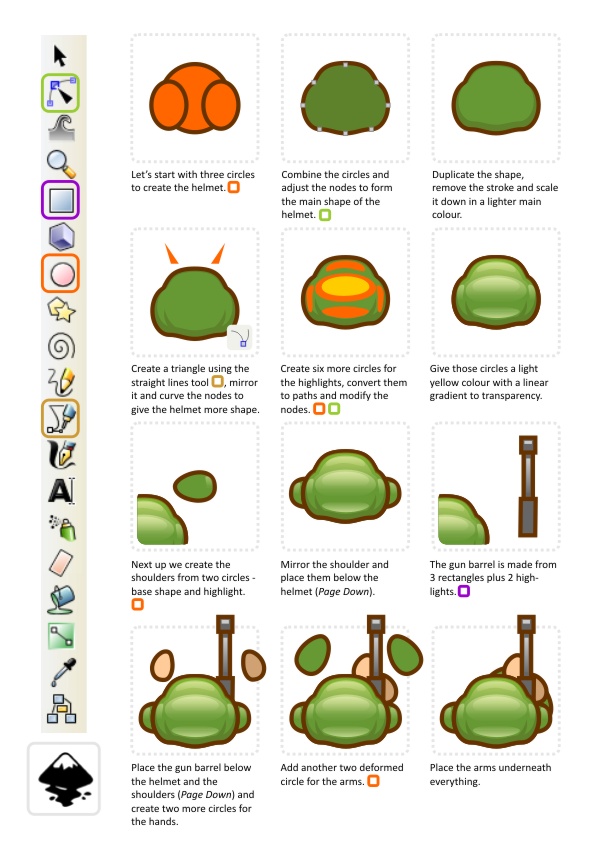
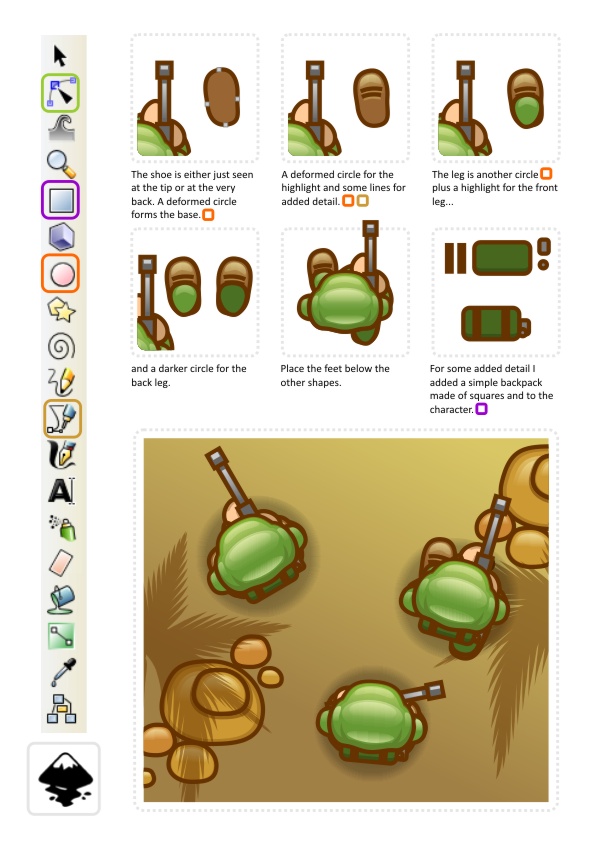
In the case of the top down soldier it’s going to be a matter of creating a helmet that is visibly a helmet, show parts of the gun he’s carrying and give him a pose that connects the gun to helmet in a believable way (e.g. a rifle standing out to in the centre of the figure is not really believable as it would ram into his stomach).
When animating the character it’s pretty much just down to the feet and the shoulders corresponding to the leg movement – in a more limited way as our soldier holds his gun with both hands which restricts the movement a little.
As with all the tutorials it’s a matter of taking this and playing around with the ideas and create variations. How would a knight in armor look from above or a caveman or a girl with piggy tails?
Note:
I didn’t go into great detail on topics covered in earlier tutorial posts (e.g. the manipulation of nodes or the gradients). If you have problems with those please check out the earlier posts on this blog. Thanks!
I didn’t go into great detail on topics covered in earlier tutorial posts (e.g. the manipulation of nodes or the gradients). If you have problems with those please check out the earlier posts on this blog. Thanks!
I hope you enjoyed this tutorial as much as I did creating the art.


